Tuesday, October 26, 2010

Edge Effects

Horse: I added an adjustment layer to enhance the color of the horse and the trees. Then I added an underpaint filter to make a more artistic look. After that I used a mask and the history brush with different strokes to produce the edge effect.

Horse Original: South Park, CO on 10/3/10 at 1:29 PM - 1/125 S at f/16
Cabin: Here I followed the hide/reveal tutorial and used a bunch of different layer masks and shapes to create this image

Cabin Original: Estes Park, CO on 10/3/10 at 12:02 PM - 1/200 S at f/5.7


Cooper: I used a mask and the history brush tool at several different opacities and sizes for this effect

Coop with Boarder: I added a white boarder on this shot to enhance the focal point

Cooper Original: Highlands Ranch, CO on 10/3/10 at 4:47 PM - 1/60 S at f/2.8
These were all really fun edits to do. I think it adds a really nice artistic element when you create edge effects. My favorite is the shot of the horse. I like how it looks more like a painting with the brush strokes created by the history brush. There's a lot of really fun and unique things that you can do with this technique!

Monday, October 25, 2010

Scanography

STAR: Rexburg, ID on 10/25/10 at 8:53 PM

L.O.V.E.

L: Rexburg, ID on 10/25/10 at 2:12 PM

O: Rexburg, ID on 10/25/10 at 2:14 PM

V: Rexburg, ID on 10/25/10 at 2:14 PM

E: Rexburg, ID on 10/25/10 at 2:15 PM


These pictures were done using a scanner. The first shot is of a single image. The second one is of the 4 different images underneath it blended together. It was actually a lot harder than I thought it would be because everything turned out opposite than you would expect. In order to capture the image correctly I had to go from right to left instead of left to right, and then backwards to what the letters read. It was fun trying out different objects on the scanner, but these two ended up being my favorite.

Tuesday, October 19, 2010

Portrait Enhancements

Drool BW: luminosity adjustment, hue and saturation softened skin with brush tool

Drool: Adjusted levels, cropped image, used brush tool to soften skin and reduce blemishes

Drool Original: BYU-I Gardens- Rexburg, ID on 10/17/10 at 5:16 PM - 1/140 s at f/4.7

Nicole: Enhanced tree colors using the match color tool, brush tool on skin, replace color on shirt, cropped image

Nicole Original: BYU-I Gardens- Rexburg, ID on 10/17/10 at 5:31 PM - 1/30 s at f/4.1


Noah: brush tool for cheeks, enhanced grass color, adjusted levels
Noah Original: BYU-I Gardens- Rexburg, ID on 10/17/10 at 5:19 PM - 1/115 s at f/4.7

Umbrella: Match color (in guy's shirt) brush tool to reduce umbrella wrinkles, cropped/rotated canvas

Umbrella Original: Rexburg Temple grounds on 10/17/10 at 6:12 PM - 1/60 s at f/2.8


For these portraits, I only wanted to add subtle changes to enhance the pictures. Since it was a cold day, Noah had spotty cheeks. With the brush tool at a low opacity, I was able to soften his skin and remove the blemishes. In the other photos, I changed the colors slightly by either matching or replacing them to enhance the portraits. I also cropped to help with the focal point of the portraits.

Portraits

R Family: BYU-I Gardens- Rexburg, ID on 10/17/10 at 5:01 PM - 1/125 s at f/5.7

Baby: BYU-I Gardens- Rexburg, ID on 10/17/10 at 5:17 PM - 1/140 s at f/3.9 

Love: BYU-I Gardens- Rexburg, ID on 10/17/10 at 4:52 PM - 1/50 s at f/3.8

Airplane: BYU-I Gardens- Rexburg, ID on 10/17/10 at 5:37 PM - 1/250 s at f/3.5
This weekend I was able to take pictures of this cute family and had a blast! The first photo is a candid shot of the couple overlooking their baby enjoying a crab apple. The second picture is an "Environmental Photograph" of the mom feeding her baby. The next shot is of the cute couple and the last is of mom and baby. These are all raw photos with no edits.

Tuesday, October 12, 2010

Camera Raw

Colorful Colorado

Colorful Colorado Original: Breckenridge, CO on 10/3/10 at 11:31 AM - 1/250 s at f/3.5
For this shot I used camera raw to edit my photo. I used the color balance to bring out the color of the sky and the water and then I brought out the fall colors by warming it up with reds and oranges. This was taken of a private road and it was behind someone's cabin. I love the reflection in the water of this image.

Panoramics


Florences's: Rexburg, ID on 10/11/10 at 2:11 PM - 1/100 s at f/10
BRC's: Rexburg, ID on 10/11/10 at 2:11 PM - 1/125 s at f/10

Twisted: Rexburg, ID on 10/11/10 at 2:12 PM - 1/100 s at f/10 
These pictures were taken "downtown" Rexburg. To make a panoramic shot, I used photomerge in Photoshop to get the images together and then cropped the image and changed the color balance to enhance the color of the sky.

COLORado

Mountain Side: South Park, CO - 10/3/10 at 12:04 PM - 1/250 s at f/10

Dirt Road: South Park, CO - 10/3/10 at 12:01 PM - 1/500 s at f/8

Cabin: South Park, CO - 10/3/10 at 12:02 PM - 1/200 s at f/5.7
Last weekend I was able to go home to Colorado. While I was there I went on a drive through the mountains and was able to see really pretty fall colors. This panoramic shot was actually not intended to be one when I took these pictures, but I thought it would be interesting to combine the three similar images. In Photoshop I used the photomerge tool and then from there flipped the cabin picture horizontally, changed the levels and saturation to match each other, added some adjustment layers and masks and then changed the color balance to warm the colors just a little bit.

Monday, October 4, 2010

Bannack Trip Photo Edits

Door: HDR with an adjustment layer and mask to combine two images. changed the opacity of bricks to look more subtle.

Door Original: Dubois, ID 9/29/10 at 9:55 AM -
Brick: Dubois, ID 9/29/10 at 9:52 AM 1/1000 s at f/3.2

Window: HDR with adjustment layer to enhance the outside

Window Original: Dubois. ID 9/29/10 at 10:01 AM 1/80 s at f/4.5

Blue: portrait (below) into an HDR photo with Dynamic Photo

Blue Original: Dubois, ID 9/29/10 at 10:37 AM - 1/125 s at f/5.7

In'n'out: HDR of original shot (below)

In'n'out Original: Bannack, 9/29/10 at 1:05 PM - 1/400 s at f/2.7

Organ: HDR image of three shots below

Organ Light: Bannack Hospital 9/29/10 2:06 PM - 1 s at f/2.8 ( +2)

Organ Regular: Bannack Hospital 9/29/10 at 207:PM - .6 s at f/2.8 

Organ Dark: Bannack Hospital 9/29/10 at 207:PM - 1/6 s at f/2.8 (-2)

These shots were all edited using Dynamic Photo HDR. I really enjoy this program because it enhances your photos at a click of a button. The first photo is a macro/blend of the door and brick photos. My favorite shot is the "window" I love how you can see the detail of the outside and the different elements of the shot. I was also impressed with the way the portrait turned out. I didn't expect the colors to pop as much as they did.  

Bannack Trip Photography


Black: Bannack Hotel 9/29/10 at 1:29 PM - 1/80 s at f/3.5


Golden: DuBois, ID 9/29/10 at 10:36 AM - 1/125 s at f/5.7

Red: Bannack Mill 9/29/10 4:01 PM - 1/15 s at f/3.5

Green: Bannack Hotel 9/29/10 at 1:17 PM - 1/80 s at f/3.5 

Blue: Dubois, ID 9/29/10 at 10:37 AM - 1/125 at f/5.7
Ghost: Bannack Hospital 9/29/10 at 1:57 PM - 7.0 s at f/8

Autumn: Bannack 9/29/10 at 2:10 PM - 1/400 s at f/5.6

Leaves: Bannack 9/29/10 at 2:12 PM - 1/400 s at f/8
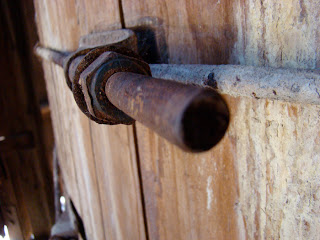
Rod Close: Bannack Mill 9/29/10 at 3:47 PM - 1/40 s at f/2.8

Rod Far: Bannack 9/29/10 at 3:48 PM - 1/40 s at f/2.8

Handle: Bannack Mill 9/29/10 at 3:52 PM - 1/60 s at f/2.7

Wheel: Bannack Mill 9/29/10 at 3:42 PM - 1/13 s at f/4
These are some photos I took while in Bannack, Montana. The first 5 are portraits, the next 3 are action/blur and then after that is reverse shallow depth. Those two pictures are of a rod inside of the mill at Bannack. It is the same shot but with different focal points. Then the last 2 pictures are macro shots of different wheel-like objects around the mill.